The third time’s the charm. After over a week of trying to get the TeslaDashCam to work, a USB Stick arrived yesterday. After again formatting with a GUID Partition Table, a FAT32 file system, and adding the /TeslaCam directory, I plugged it into #CO2Fre.
But that wasn’t all! Turns out I also got the 2020.12.6 TeslaOS. Eager to install, I hit the install now button because I knew this update would be adding auto-stop at stop signs and stop lights. The quirk with the update is that it will even stop at green lights, so if you want it to keep going you need to keep your foot on the accelerator to get it to run the green light. It’s probably okay, though, to let it stop on yellow or red. Also, it won’t turn for you; to do that, you need to take control of the wheel.
Finally, once that was installed and Stop at Traffic Lights was activated, I decided to have another go with my 2TB SanDisk Extreme SSD. Because it was also formatted properly and had the same directory structure as the USB Stick, I had a hunch it was because the drive was a whopping 2TB that the Tesla couldn’t recognize it.
With a little work, I re-formatted the drive as GUID, with one FAT32 partition with 996GB and another 1TB of free space. After adding the /TeslaCam directory, it worked like a charm!
In conclusion, although the 2TB SanDisk Extreme SSD drive works with Tesla, Tesla cannot understand drives above at least 1TB. This seems like a failing of the TeslaOS, but one I can live with. After all, my long-term plan is to have a Raspberry Pi Zero W installed and use the 2TB drive for portable backups.
Now that I have my DashCam back, and have the automatic stopping at stop signs, I can’t wait to take #CO2Fre for a spin. I hope to be cruising on a cloud soon!
I really wanted to have my DashCam fixed by today. I really did. But then the hypochondriac got involved, called Tesla, and have them tell me some least common denominator information information that they wouldn’t accept there was a problem with my Tesla unless I tested it with a USB Key [sic]. As I didn’t have any USB Sticks handy, I ordered one that was Tesla branded, as well as a faster, High Endurance MicroSD Card and new adaptor.
The USB Stick won’t arrive until later in the week but the flimsy excuse from the hypochondriac threatened to call the police if I didn’t cancel my service request and wait for my USB Stick order to arrive. She said some lawn care folks would be here today but of course they didn’t come, so I ended up cancelling my appointment for nothing.
However, not wanting to give up, I got my MicroSD Card and tried it in #CO2Fre. It was formatted as exFAT so I formatted it as FAT32 and plugged it into #CO2Fre. Nothing.
I did some more research and realized that most drives come formatted with an MBR to allocate its partitions. I pulled the SanDisk Extreme SDD #CO2Fre and it too had an MBR. Since Tesla recommends using a GUID Partition Table, I opened up DiskUtility and reformatted the entire drive with a GUID Partition Table and a FAT32 File System.
This is what DiskUtility shows for the SanDisk Extreme SDD 2TB Drive. Under the heading, you can clearly see the drive is formatted as a GUID Partition Map, as requested by Tesla
This went quickly and in the end I had the system correctly formatted as per Tesla’s specifications. The drive was formatted with 2TB of free space.
This is what DiskUtility shows for the one partition on my SanDisk. The Partition is called TESLACAM as FAT32 only supports uppercase names. Below that, you can see the format is indeed FAT32, as requested by Tesla
Finally, I added the TeslaCam folder.
This is the root folder of the SanDisk drive. You can clearly see a TeslaCam folder in the root, as required by Tesla
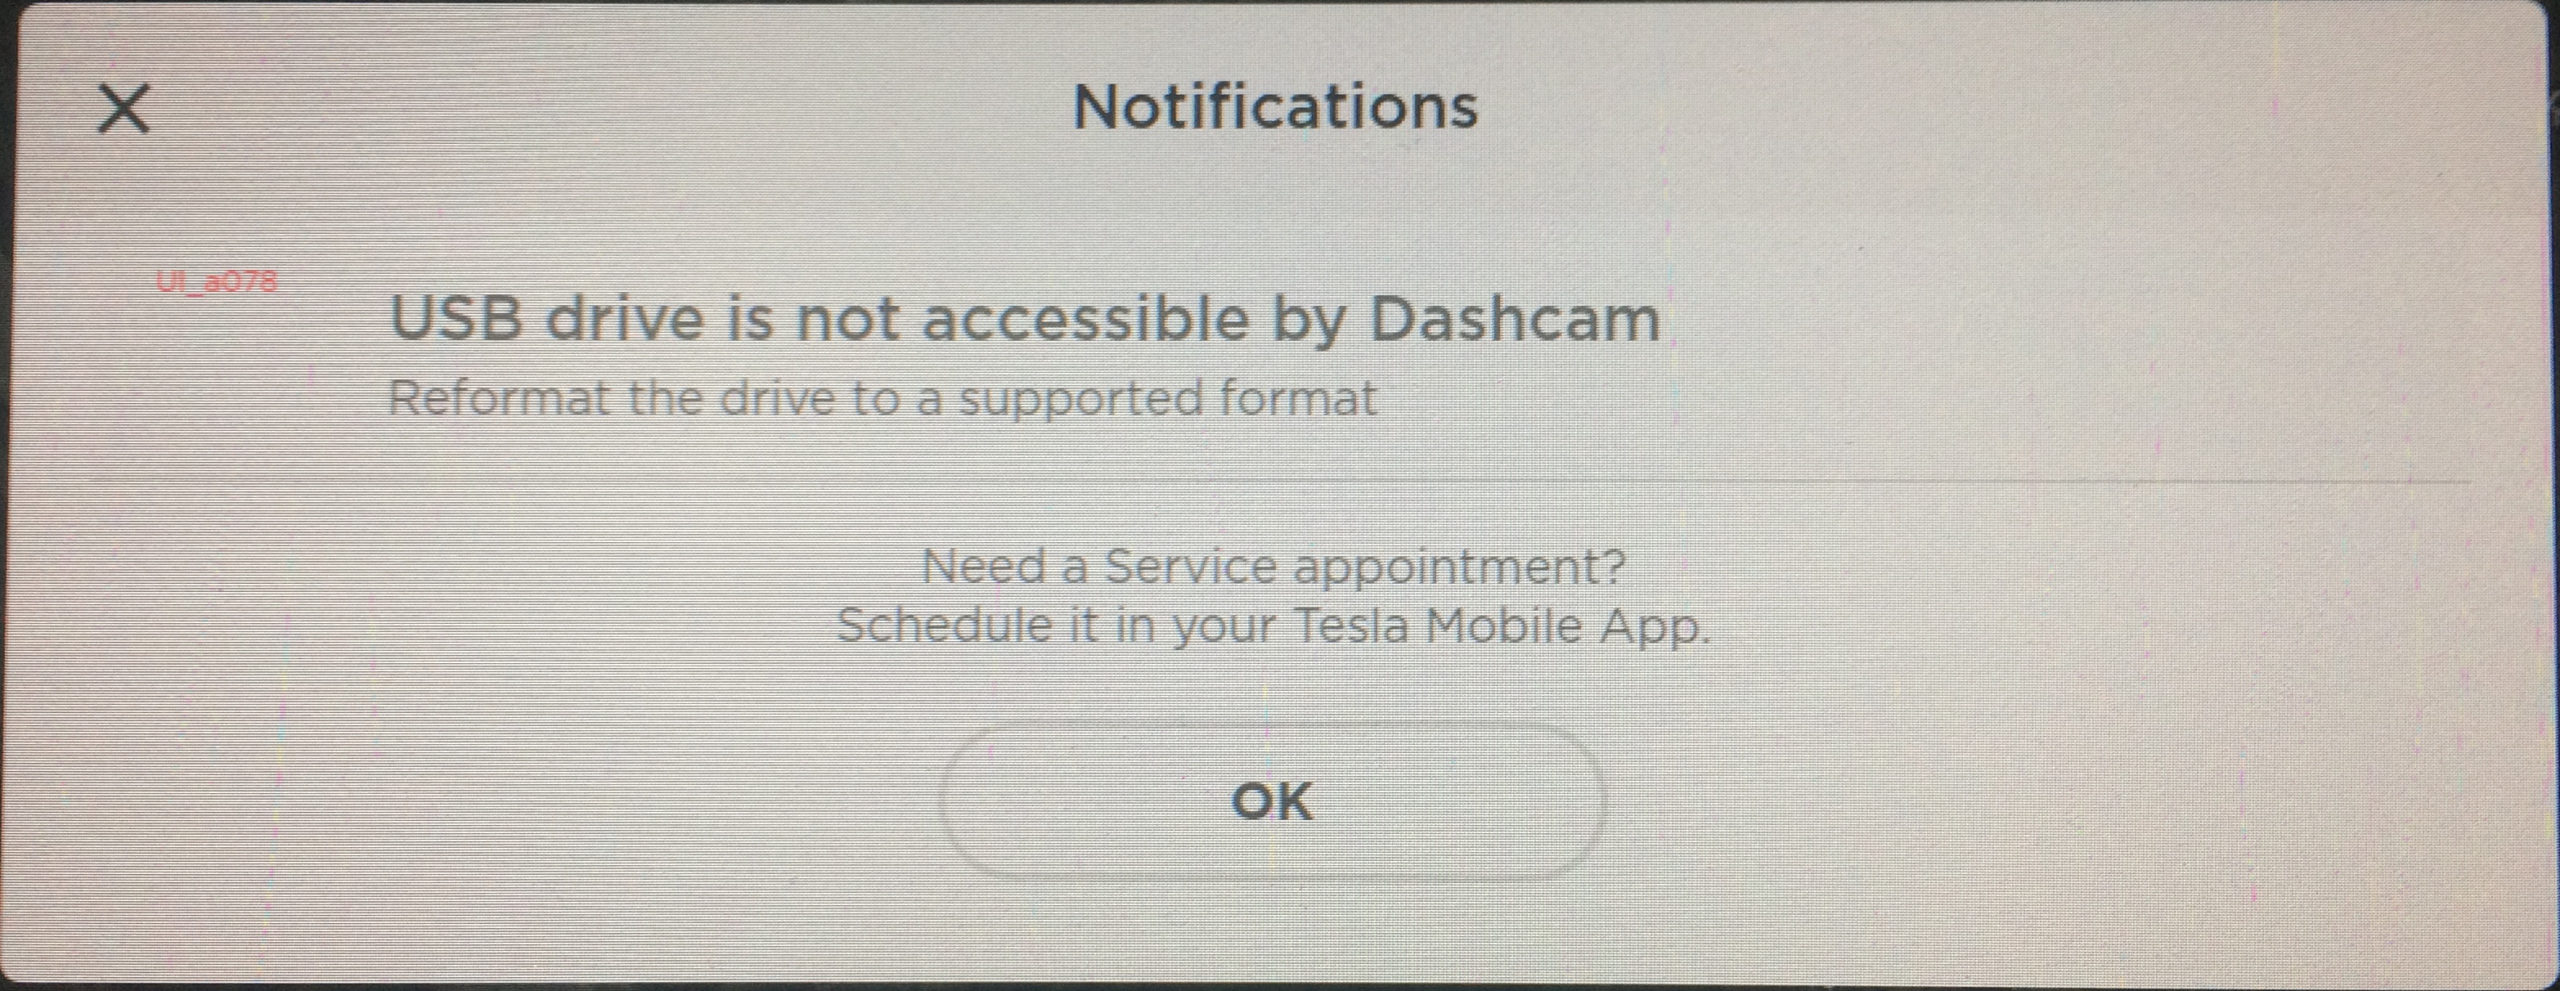
With the drive reconfigured to Tesla’s specifications, I donned the rubber gloves and tried the SanDisk SDD in #CO2Fre. Finally, I got a camera in the toolbar. Only there was an X on the Camera and a warning label. When I clicked the warning, #CO2Fre gave me a mysterious UI_a078 error,
Despite doing everything right, using an externally verified SanDisk Extreme SDD with a GUID Partition Map and a FAT32 filesystem with a TeslaCam folder, this is what #CO2Fre tells me. I was unable to verify what the UI_a078 message means and more conversations with Tesla recommend I schedule another appointment
Because the hypochondriac doesn’t want them to come to my house to fix #CO2Fre, she insisted I call Tesla’s tech support. I reiterated the issue to the support staff, including the note about UI_a078, and told him about my problems obtaining a USB Stick, and he recommended I make a new appointment as the Tesla Mobile Team Member would have a USB Stick he or she could use to test the USB ports of #CO2Fre.
Of course, the hypochondriac vetoed this idea and instead she ordered a couple, cheap USB Stick that should get here by Sunday. If they don’t work, I may be able to get support to come out next week to help me finally resolve this most vexing issue.
Alas, until then, I won’t be cruising on the cloud.
I haven’t been able to use the TeslaCam since 27 July 2019. That’s because, around TeslaOS 2019.28.1, Tesla broke most USB Sticks used for Dashcam functionality, because, it claimed, they were too slow.
Not having a DashCam and having such a mysterious and incomprehensible error—my USB stick was fast enough—I was afraid to buy a new USB stick to see if I could get it working again. For months I dithered on the issue, totally unsure what Tesla wanted, and wanting so badly not to waste money on a device that would fail with Tesla.
Compound that with, in December, 2019, thanks to an AutoPilot, #CO2Fre failed to stop when a vehicle with California plates cut me off by jumping into the exit lane ahead of me at the last minute, causing $4,000 worth of damage I can’t remotely afford to pay. The scratches, therefore, remain to this day. And as no solace, I don’t even have the Dashcam video to go over the details even if I wanted to make an Insurance claim. So, I have scratches but still no Dashcam.
Then TeslaOS 2020.12.5 came out, which added support for watching Dashcam videos within #CO2Fre. Since I had the time off thanks to Covidapolis, I decided to try again with the Dashcam, and found this neat video:
I didn’t have access to my car because of the hypochondriac until the day of my #CO2Fredemo. I plugged in the SanDisk drive with its USB-C to USB-A adaptor and… nothing. I had the drive plugged in, but no camera was showing, and I couldn’t show off any of the Dashcam features during my entire presentation, including Dashcam footage of the speed test on the main screen after I parked, despite having the drive plugged in. The demo still went well, but I’m annoyed how hard I tried to get this working and still failed.
Afterwards, I tried to play around some more. Doing so requires me to go through decontamination because, for some reason, the hypochondriac thinks #CO2Fre has SARS-CoV-2. Meaning, I have to keep changing my clothes every time I go to the car because sitting in my car contaminates my clothes.
The drive was exFAT, so I reformatted it as FAT32. The drive did flash on the screen after some cord giggling, but it said it wasn’t formatted properly despite having the TeslaCam folder and being named TeslaCam. Since I’ve read that Tesla supports exFAT, I formatted it back as that, and it sits now, unable to connect.
I also tried my MicroSD chip with an adaptor. Originally, the chip was supposed to be part of the Raspberry Pi, but I wanted to test to see if it could be used as the TeslaCam directly. No dice. I’d hook up the Raspberry Pi and try with that, but I have to finish updating my Résumé and fix my broken Zone File updater for Reston Writers first. I just have too much going on to worry about going any further with this nightmare of Tesla‘s.
The way I see it, the drive works in a PC, the drive works in a Mac, it just doesn’t work in #CO2Fre. When you’ve tried everything else, the simple answer it so blame Tesla. So, I made a Mobile Service Request and they should be here Friday morning.
Why must Tesla make this so hard!?!?
In any case, unless I find another set of clothes to wear, even without my Dashcam, I shall very much miss cruising on a cloud.
Last week I mentioned my struggles about eliminating the squeak from #CO2Fre. Then, of course, I was forced into a one-room cell as a hypochondriac put me into lockdown. On Sunday, I was released. I would say I finally had a clean bill of health but the truth is I was always healthy and just had to deal with irrationality. But that’s yesterday’s story and today I want to talk about how I wanted to finally pick up #CO2Fre… and couldn’t.
I got a ride to the Tyson’s Corner Service Center and used the Tesla app to find #CO2Fre. She was parked in the back, against the side of the building. I had to open it with my ancient iPhone 5S. We sanitized #CO2Fre and then my ride left. There was a large Tesla Model X in front of her. Much as I try to inch her out of the space, I can’t do it. I get within a couple centimeters of the car next to me only to have to give up as impossible.
I scanned the QR Code and indicated I was there for pickup. I also called Tesla and left a message. I told them I couldn’t move #CO2Fre and my key wasn’t inside. Then I asked my ride to return as I waited for the callback that never came. I figured it wouldn’t because it was Sunday, but then it never came on Monday either, so I was rather distressed.
Finally, I called them on Monday and they agreed to move #CO2Fre to an accessible area where I could pick her up Tuesday morning before opening. They also arranged where I could pick up the key. I just hope my ride wakes up in time. After all, she was also my jailer…
#CO2Fre was moved on Monday to a location where she could be safely retrieved and finally come home.
Hopefully soon, I can get back to cruising on a cloud.
Late last night, just as I completed my post about Tesla trying to scam me, I decided to upgrade WordPress to version 5.4. Normally, this shouldn’t be an issue, but for me, since I run a multisite system, there are extra security issues and directory layout complications that must be taken into account.
The first step was, apparently, to backup my database. Since I’ve never backed up the mysql database before, I felt this seemed like a reasonable approach. I certainly didn’t want to pay JetPack to do it; I’m a genuine code jockey, I can do my own backups. After some digging around, I found mysqldump. Unfortunately, all the instructions on how to use it were incorrect.
After some further poking around, I finally came across the correct syntax. Essentially, the user name and host have to come before the --all-databases command. Also, the host can’t be localhost, it must be the IP for the local host. Unfortunately, I was not able to find a way to get it to prompt for my password which meant I had to type my password in the command line, leaving all there in the open for any history recall to see. Not very secure at all.
mysqldump command; note <uid> and <pw> are placeholders for the user name and password; you must replace this with your own values.
Alas, I was not able to find a way to get mysqldump to prompt for a password. I think if I have more time, I may write a python script which builds the command by first prompting for the password. At least that way, the password wouldn’t be stored in the command line history.
The mysqldump command is quite clever. It just stores the list of sql commands that would be required to recreate the databases you have stored. However, the file is rather big and being text, it compresses nicely with bzip2 -9, which is what I did.
Once I did this, I was ready for the main Upgrade. I held my breath and pulled the trigger…
This site is built with WordPress… and a very skilled programmer who has been writing HTML since 1993 and hacking UNIX for even longer.
The install progressed along nicely until it tried to write a file to the wordpress directory. 🤦🏻♂️ I logged into my server and sure enough, the permissions on the wordpress directory were 755, which meant the user could add and remove files, but the group and anyone else could not. You see, with my multisite, I try to have all wordpress files with user wp-user and group as www-data, to work with apache. And apache runs all web processes as www-data for both user and group. Thus, when WordPress asked to add a file to its codebase, apache could not write it because the www-data group didn’t have permission, only wp-user did.
Change all the wordpress directors to allow www-data to add and remove files from them.
Realizing my mistake, I changed the permissions on all directories to be 775 (both wp-user and www-data could add and remove files). Unfortunately, it was too late. Instead, I had no choice but to blow away my current install and replace it with a fresh, new install of WordPress 5.4. At least, that’s what I did on a high level. The details, though, are a bit more complex.
Once I extracted all the wordpress files, I needed to get their ownership to match the settings for my wordpress install. I was able to do this quite easily with the chown command.
sudo chown -R wp-user:www-data wordpress/
Command to set the right file ownership for wordpress.
Next, I set the directories as above. Finally, the files themselves had to have the right permissions. Namely, they should be readable and writable by wp-user and the www-data group, but only readable to others, not writable. Namely, they needed to be set to permission 664.
Change all the wordpress files to allow www-data to modify them.
Next, I had to copy over the active wordpress configuration file. This file is actually fairly spartan as all the active site configurations are actually stored in /etc/wordpress; my wp-config.php actually just scans this directory for configurations. The configurations, in turn, point to directories in /srv/www/wp-content with the site-specific files. I thuns needed to bring that file over to the new install.
cp /usr/share/wordpress/wp-config.php wordpress
Copy the configuration to the new wordpress install.
Next, I wanted to preserve the Languages I had installed. I just copied the entire directory over to the local install.
Copy the Upgrades directory to the wordpress install.
Finally, I needed to move the links to my shared, dynamic contents that are for all the sites on my server. Specifically, the uploads, themes, and plugins folders all rest in /var/lib/wordpress/wp-content. (Technically, Uploads rests in blog.restonwriters.org site-specific Uploads directory, but that’s something I’ll fix later to conform with the same layout Themes and Plugins use.) Since these are already symbolic links, they can be moved to the new wordpress install directory to replace the defaults.
One caveat however, is the default install for wordpress comes with one plugin and three themes. In order to preserve those, I renamed the default plugins directory to plugins-default, and the default themes directory to themes-default. This was necessary before the symbolic links could be moved since those directories were in the way.
Move the symbolic links to the plugins, themes, and uploads directories.
Finally, the apache permissions file needed to be moved as it was also a link, pointing to /etc/wordpress/htaccess. I store the file there because it makes it easier to maintain in case I accidentally bow the .htaccess file away.
cp /usr/share/wordpress/.htaccess wordpress
Move the symbolic link to the .htaccess file.
Once all this is done, it’s a good idea to run the chown and chmod commands from above on the wordpress install directory once more to make sure the copied files and moved links are also properly attributed.
Finally, it was time to perform the brain transplant and move my staged wordpress install to the active /usr/share/ directory. I moved the current install to a temporary directory and then moved my staging install to the /usr/share/ directory to replace it.
Replace the installed wordpress with the new version.
Once all this was done, I was able to get to my web page, and wordpress prompted me to upgrade my database. Once this was done my sites were back online. In total, this site and its sister sites were down for a total of about forty-five minutes. It was a long day yesterday and I was exhausted but I did get it done and you can now see the results.
I hope you enjoyed my story about hacking UNIX. Please note, I am available for hire if you like what you see!
After I got #CO2Fre back from Tesla, my coworker and I noticed some squeaking sounds as I would drive the car at low speeds, making turns under humid conditions. So, I made the soonest appointment available to both me and Tesla, which was today, 31 March, 2020, which is therefore going to be the topic of my 50th day in of quotidian postings.
Of course, then SARS-CoV-2 happened, and all the crazy things that came with it. I haven’t left the house since my job went to 100% telework apart from a couple outings to the grocery story and stroll inside my housing community. So, when Tesla reminded me of my appointment, it wasn’t so much that I was eager to get out (at least I don’t have to fear a physical abuser) as I was eager to finally get this over with in terms of having to deal with Tesla and a potential fault in their repair.
I got up early this morning, ready to head over to Tesla. I was, alas, so tired, I ended up locking my CAC Card. The details aren’t important, but I will just add that resetting it required a long drive to work and a long drive back just to restore access. But that had to wait until after I dropped #CO2Fre off.
Anyway, I got in #CO2Fre and noticed a software update. Not wanting to delay my appointment at the Tyson’s Corner Service Center, I headed straight over and initiated the update as I arrived.
I arrived at Tesla a little after my 08:00 appointment and spotted some interesting signs on the windows. After waiting a bit for folks to pass, keeping a social distance from anyone, I made my way over to the door.
The signed contains a QR Code that I could scan with my phone in order to check into my appointment. I scanned the code and opened the web page associated with it. The page contained a list of questions: who I was, why I was there, and did I have an appointment. I filled it out and got a message saying I should wait for a call to confirm my appointment.
Registration for service was easy as cake. Just fill in your name and your reason and if you have an appointment and they’ll call you when they’re ready.
I went back to #CO2Fre; the software was still updating. I got the call and we agreed to leave the car where it was. I got some Uber credits but had a ride home already and so used that to get home, then get a ride to work to fix my CAC, and then back home again. Phew.
Then I got a text from Tesla saying they sent me over an estimate and said I needed to replace some tyres. Are you freaking kidding me!? Didn’t I just drop almost $2,000 on tyres at the beginning of the month!?
Needless to say, I was not amused.
When I got this in my mail, I was shocked. I took the car in, after waiting 3 weeks for a follow appointment to the tyre replacement at the beginning of March, to resolve a squeaking issue with my tyres and front suspension. I thought it’s be just, at most, $100 to do the diagnosis, only to be sent this behemoth of a bill for just over $2,000. Having just paid almost that amount at the beginning of the month and facing a 1 week suspension in addition to docked pay, I could never in a million years afford this estimate and I complained to Tesla until I was blue in the face. Not shown is the $84 in tax and the total of $2,043.75. Oy, gevalt!
Looking over the estimate I saw they recommended replacing all four tyres! Seriously? I had just replaced two rims at the beginning of the month, but, as I looked over my meticulous history of tyre replacements, it turns out I replaced a tyre just three months ago on 3 January 2020, and another on 4 November 2019. Both tyres were relatively new and there could be no possible way they could both be so worn to need replacing. It was bad enough the other two tyres were April and May of last year, but some of the tyres were less than six months old!
Looking over the costs, not only were they charging me for four tyres, but they were also charging me for a $160 Tyre Setting and a $302.25 Tyre Alignment, for a total of $1946.25 in tyre repairs! That would have been a total of $9,647.95 on tyres for 42,695 miles of driving over 19½ months!
It took a number of texts for me to get through to Tesla. I was quite frank. I didn’t agree to any tyre replacement and demanded they generate a new invoice for me without the tyre replacements. Furthermore, if they though my tyres were showing wear, I demanded they show my the tread depth to prove they had wear given one tyre was just three months old, and another only five. Thankfully, the obliged.
After many irate texts, they agreed to remove the tyres from the invoice which made it a manageable $97.50. I did ask them for Tread Depth readings though, just to verify that maybe some of the tyres needed replacing.
The new invoice was quite reasonable. Less than $100 for a diagnostic check which so far turned up nothing. I agreed to that and then my service advisor sent me photos of the tyres with the tread measurements.
This Tyre Tread is nearly perfect at 8/32″
This Tyre Tread is almost perfect at nearly 8/32″
This Tyre Tread is close to 6/32″
This Tyre Tread is pretty bad at only 5/32″
Clearly, two tyres were at around 8/32 inch depth, which is pretty nearly as good as new. The other two hovered around 5/32 and I agreed they probably should be replaced. I therefore agreed to a new invoice where only those two more worn tyres would be replaced. Tesla kindly obliged.
This is the revised service estimate for the two low-tread 5/38 depth tyre replacements. Not included is the $42 tax, which was the perfect answer to this issue, for a total of $939.50.
Although the cost jumped to nearly $1,000, I agreed to it as the best course of action. They dropped the wheel setting and alignment which also lowered the cost quite a bit. I’m hoping I can get the alignment done elsewhere when the Covidapolis is over. It still brings my total lifetime tyre costs to $8543.70, with seven tyres and seven rims, but it’s much better than $9,647.95!
Plus, I got a software update.
The morning of my drop-off I noticed there was a software update. I set it going when I got to the dealership and it was done by the time I got home.
I’m not happy that it will take me a month an a half to pay for this repair as I sink further into debt, but mainly I miss driving #CO2Fre. Die SARS-CoV-2, die!
Our esteemed leader Kevin Sadeghian of the Northern Virginia Tesla Owners Group, like all of us, misses our occasional Tesla meetups. The last time we met, I was late, without #CO2Fre, and had just voted, and so was a bit out of it, not even appearing in the group photo. That was just the start of the Week from Hell for me, which was the same weekend I got a $1,800 bill from Tesla and was at the whim of lackadaisical Uber drivers.
So Kevin, realizing we’re all at home, Sheltering in Place, created a virtual meetup. He took an empty parking lot, with a photo of his Tesla, and invited all of us to photoshop our Tesla in there with him, as if we were actually meeting. Starman, my good friend Mel‘s Tesla Roadster, #PascalTesla from my dear friend Margie Hunter, and many other members.
Unfortunately, because of the events from the Week from Hell. Fast forward to today and with the scare surrounding the Weather and Safety Leave, which I’m still not willing to talk about publicly, I was so afraid when I researched that last weekend that I would not be paid because of some documents I read on the Internet. I thus refused to add #CO2Fre to the photo, decrying that I was worried I would not be able to keep here if I was to go for months without pay on Weather and Safety Leave. I am still facing one week of unpaid leave due to the Week from Hell, bringing the total cost for that seven day nightmare close to $5,000 out of my pocket—not to mention my Hedge Fund has tanked to July 2017, initial levels after just making a $2,300 commission payment in December.
However, when the office confirmed I would be on paid leave, I figured I could in fact weather the storm. I would be bankrupt and #CO2Fre would doublessly be repossessed if one more tragedy befell me, but for now, I’m just okay. And so I put #CO2Fre right next to #PascalTesla.
When I got home from work yesterday, I was notified of software version for #CO2Fre from Tesla. Turns out, I was one of the first as TeslaFi, which informed me last night that TOS 2020.8.1 was detected in the wild in Florida. turns out, as I was getting a ribbon at yesterday’s event, #CO2Fre was just waiting for me to push the button to install 2020.8.1 on herself.
When the update came down, I was shocked, and melancholy. On the one hand, I always wanted to try Track Mode. Now, Track Mode is even customizable. You can configure different settings for how your Tesla performs based on the track you’ve taken her to. Awesome!
The problem derives from the simple fact that I can’t afford to go to a Track to test it. That’s to say, I probably could afford to go if I really wanted, but I’m just too lazy to find a good track that would be fun for me to ride in my Tesla. Also, I’d probably not want my Insurance to find out. But I so want to do it! I didn’t may $10,000 to maintain Performance Tyres on #CO2Fre for nothing, did I? Did I?!?!
What’s more, ever since my USB Stick stopped working in #CO2Fre, I’ve been worried about buying a replacement that won’t fail so quickly. Getting videos of my Track sessions would be icing on the cake, if only I could find the right drive.
All in all, I’m excited to try the new features out even if sad that I probably will have to wait and probably be forced to replace my Performance Tyres before I get the opportunity. Alas, and alack.
Today I evaluated an absolutely wonderful fellow Toastmaster. Rick Halstead is no novice to Toastmasters, but today was his Ice Breaker. That’s because anyone in ToastMasters these days is now using the Pathways system to progress through their journey and Rick, though an old hand and excellent Toastmaster, had yet to start his Pathways journey. I was very honored to be his evaluator when he took this first step in a new direction.
I took an Uber to the meeting as I had leftover credits from Tesla and #CO2Fre needed an update, but I’ll write more about that tomorrow. It was close, but I arrived just on time. I was able to convey Rick’s wishes to make sure he didn’t embellish too much and advised him afterwards how you could use a little more embellishment to his advantage, including a summersault. But overall, Rick was very hard to evaluate as there was so little fault with his to all intents and purposes perfect speech. Spend most of my time in fact rattling off all the things he did right like dynamics and gestures and our shared love for New Zealand.
My friends Laura and Leigh-Ann were both stiff competition as wonderful evaluators today and I felt sure one of them would get the ribbon for best evaluation. But to my surprise…
Well, I have the Autopilot Hardware Version 3 installed, that’s the good news.
I took my car in for a slow leak in my driver’s rear tyre last Thursday, also asking them to check the squeaky breaks and to rotate the tyres as I’ve not done that in a while. As mentioned before, I got a call to install the 3.0 version of the Hardware during the same visit. The whole thing would have cost $409.50, mainly because of the $234.00 brake inspection. They expected to be finished by Friday just before our Northern Virginia Tesla Owners meetup at Fuddruckers on Saturday.
Then I got text just before the car was supposed to be done telling me that the tyres were fine, but I needed new rims. New rims!?! I had no choice but to authorize it.
Today, my car should have been totally fixed and But they haven’t even got the rims in stock yet and it might not be before Thursday!
I look forward to when the car will finally be fixed and I won’t have need to order any more Ubers after my final drop-off at Tyco.The Uber may be covered by the Tesla Voucher, but I still have to pay the tips, and those range from $3–$11 per trip! At least, though, I don’t have to drive and every driver I’ve been with deserved his tip.
The thing is, though, those Aluminium rims are expensive. The tyres themselves aren’t cheap either, and in 41,877 miles of driving #CO2Fre, I’ve had to replace no less than 5 tyres and 7 rims for a total of $7,701.70 over the last 18 months!
Date of Service
Number of Tyres
Number of Rims
Total Cost
2019-03-04
0
1
$807.90
2019-04-08
2
2
$2,336.60
2019-05-10
1
1
$1,168.30
2019-11-04
1
1
$1,178.90
2020-01-03
1
0
$426.00
2020-01-30
(Patch Only)
0
$78.00
2020-03-02
0
2
$1,706.00
2020-03-31
2
0
$842.00
Total
7
7
$8,543.70
I have no original tyres and am almost on a complete set of second rims! Because I495, the Capital Beltway, is so prone to potholes, there’s, like 4,000 of them! And that doesn’t even include the fact that I have no original glass, be it windscreen, roof, or back. I’ve had to replace my roof twice, in fact, and the latest panel doesn’t even have the cool, reddish sheen.
But my point is this: the Performance Tyres are too expensive, especially for everyday driving. I can’t afford keep dropping nearly $8,000 every 18 months. I’ll have depleted my saving account before I can even pay off #CO2Fre.
It’s come to the point where I am seriously debating cutting my losses and getting some cheep, wide-profile tyres and just give up on my beloved Performance Tyres. If I do go to cheap tyres, I’d still like my Performance Tyres for the track, when, someday, I’m able to bring #CO2Fre to the track, but otherwise just use regular tyres. The thing is, I’d have no place to store the Performance Tyres when I’m not using them, never mind have nowhere to store them.
If I give up my Performance Tyres, I’m probably giving them up for good. $4,000 or more, down the drain, a sunk cost. I just don’t know. It’s a little over $425 per month in addition to the loan payments to maintain the Performance Tyres, and that’s more than I earn in the same period. I just can’t afford to keep them. But I don’t want to lose them either.
On the other hand, since the major expense is the rims, could I just get steal instead of aluminium so they don’t bend so easily? I don’t mind the slightly reduced range if I can save $5,125 a year in tyre and rim replacements!
What do I do?
[crowdsignal poll=10514087]
Update 2020-04-01: As of 1 April 2020, the total cost has risen to $8,543.70 thanks to a follow-up to the 2 March service when #CO2Fre started to have a squeaking sound in its steering and breaking under humid conditions. The table above has been updated accordingly.